Add and manage tunnels
A tunnel is the configuration that says which gateway to connect to and how. Your administrator
issues it, usually as a QR code or a .conf file. Crux can hold several and connect to one at a
time.
Open the Tunnels tab
Like Settings before registration, the Tunnels tab is greyed out until at least one tunnel exists. For the first one, tap Create tunnel on the Home tab.
That opens the Tunnels tab with its add menu already expanded.
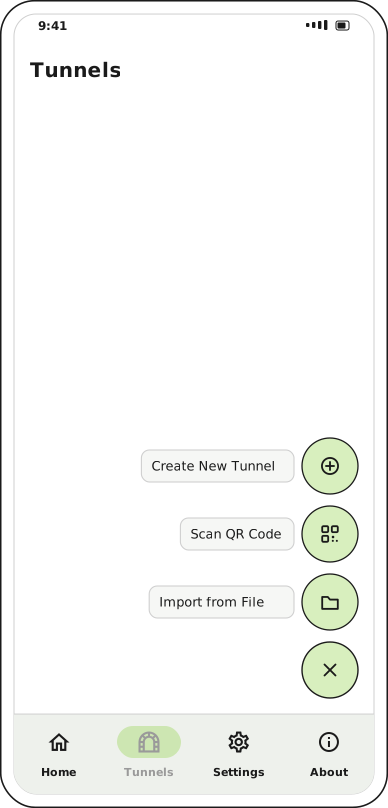
Three routes to the same result. The button at the bottom right toggles the menu; the X closes it again.
| Route | Use it when |
|---|---|
| Scan QR Code | Your administrator showed you a QR code. Fastest, and no typing. |
| Import from File | You were sent a .conf file, or a screenshot of a QR code. |
| Create New Tunnel | You were given the individual interface and peer values. |
Scan a QR code
Tap Scan QR Code. Crux asks for the camera permission the first time.
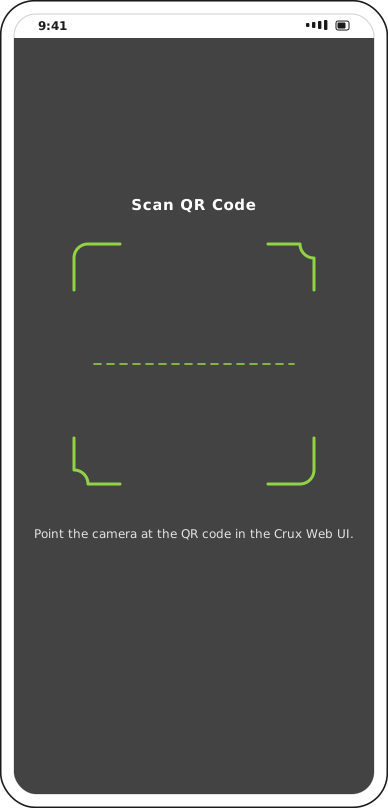
Hold the code inside the frame. The scanner reads it as soon as it focuses — there is no shutter button.
Crux validates the configuration before accepting it. A code that is not a valid WireGuard configuration is rejected with Invalid QR code configuration and the scanner stays open.
Name the tunnel
Both scanning and importing end at the same dialog, which asks what to call the tunnel.
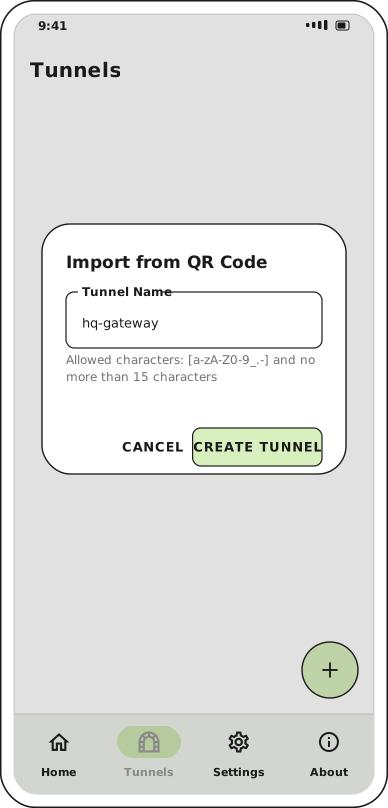
The name is yours to choose — it is a local label, not something the gateway checks.
Names are limited to 15 characters from a-z, A-Z, 0-9, _, . and -. The field stops
accepting input at 15 characters rather than warning you.
Tap Create Tunnel. A confirmation appears at the bottom of the screen and the tunnel joins the list.
Note
The dialog is titled Import from QR Code even when you imported from a file. The behaviour is the same either way.
Import from a file
Tap Import from File and pick the file. Crux accepts:
- a
.confWireGuard configuration file - an image of a QR code, which it scans out of the picture
Either way you land on the naming dialog above.
Create a tunnel by hand
Create New Tunnel opens a plain editor where you type the values in yourself.
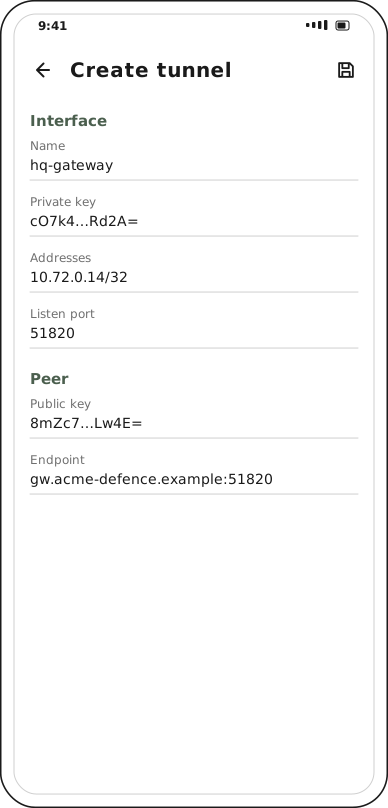
This screen is the underlying WireGuard editor rather than one of Crux's own, so it looks different from the rest of the app. Save with the icon in the top bar.
You need, at minimum, the interface private key and addresses, and the peer public key and endpoint. Get them from your administrator — they cannot be guessed or derived.
The tunnel list
Every saved tunnel appears as a row.
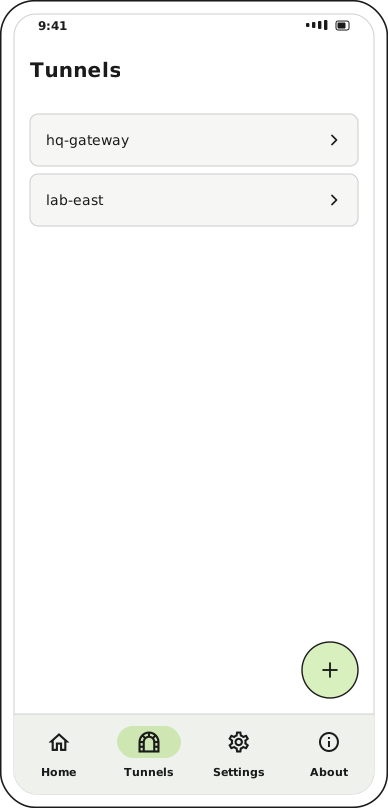
Tap a row to open its details. The add button stays available for further tunnels.
Inspect a tunnel
The detail screen shows the configuration in two sections, Interface (this device) and Peer (the gateway).
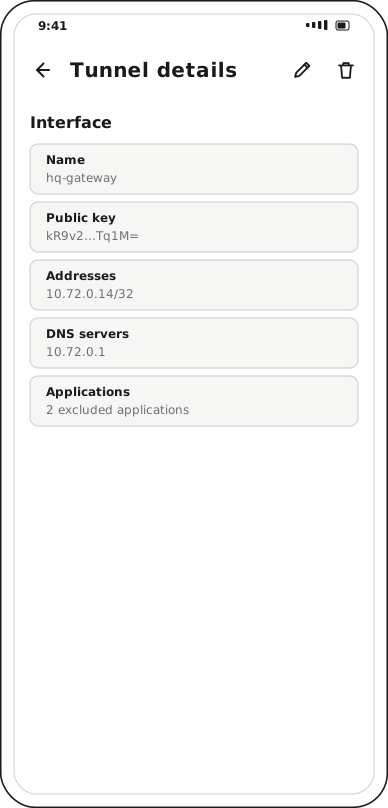
Interface — how this device presents itself.
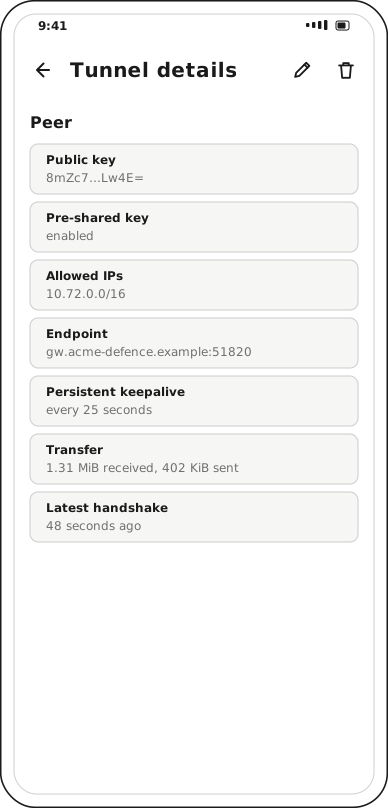
Peer — the gateway, plus live transfer counters once connected.
Tap any row to copy its value to the clipboard. That is the quickest way to send a public key to your administrator without transcribing it.
Two fields only appear when there is something to show:
- Transfer and Latest handshake appear once the tunnel has carried traffic
- Pre-shared key shows only
enabled, never the key itself
Edit or delete a tunnel
The detail screen's top bar carries an edit (pencil) and a delete (bin) action.
- Edit switches the fields into text boxes. Save with the tick, or discard with the cross.
- Delete asks for confirmation, then removes the tunnel immediately.
Neither works on a running tunnel
Crux refuses to edit or delete the tunnel that is currently connected, and says so at the bottom of the screen — Can not edit running tunnel or Can not delete running tunnel. Disconnect first.
Next step
With a tunnel saved, connect.