Add and manage tunnels
A tunnel is the WireGuard configuration that says where your traffic goes and which peer it is protected for. Your administrator issues one; Crux does not create it for you.
Everything on this page lives in the Tunnels tab.
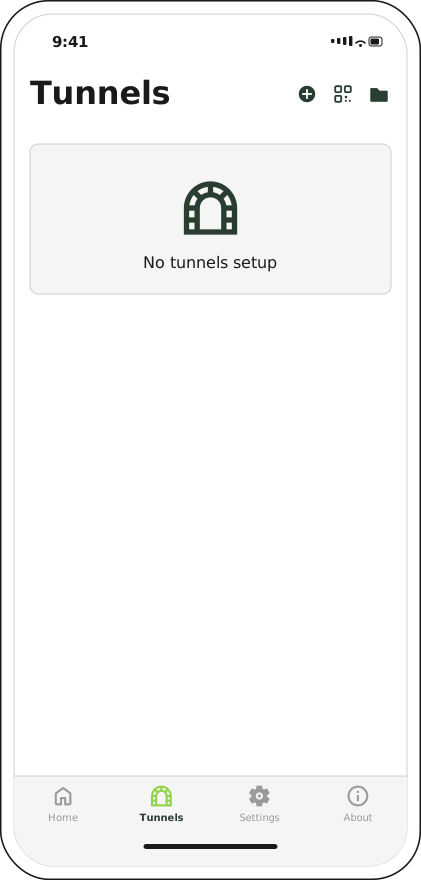
Three ways in, in the toolbar: create by hand, scan a QR code, or import from a file or the clipboard.
Choose a method
| Method | Use it when | Toolbar icon |
|---|---|---|
| Scan a QR code | Your administrator showed or emailed you a QR code | |
| Import a file | You were sent a .conf file |
|
| Import from the clipboard | The configuration was pasted to you as text | |
| Enter it by hand | You have the values but not the file |
Scanning is the fastest and the least error-prone. Type the values in only as a last resort — a single wrong character in a key produces a tunnel that connects and then silently carries nothing.
Scan a QR code
- Tap the QR code icon in the toolbar.
- Grant camera access if you have not already.
- Hold the device so the whole code sits inside the frame.
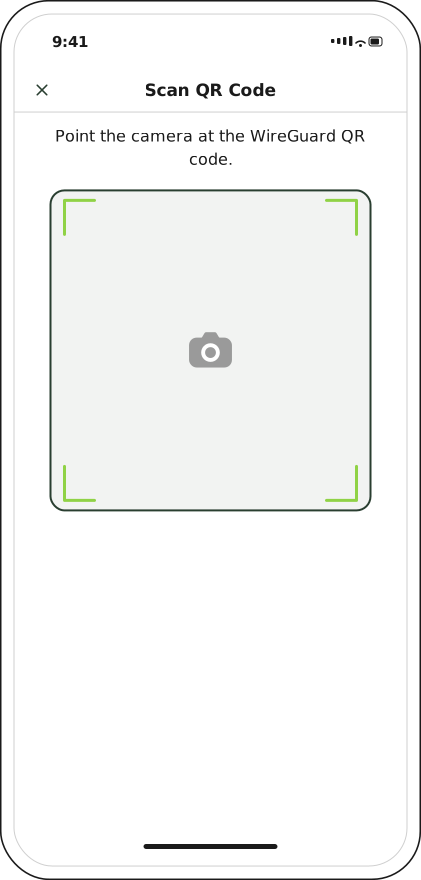
The scanner reads standard WireGuard QR codes — the same ones the WireGuard app produces.
Crux recognises the code as soon as it is fully in frame; there is no shutter button. The scanner closes and drops you into the tunnel form with every field already filled in, so you can check the values before saving. Tap Create to save it.
If nothing happens, the code is either out of frame or is not a WireGuard configuration. A code that scans but will not import produces an error toast rather than failing silently.
Import a file or the clipboard
Tap the folder icon in the toolbar to choose a source.
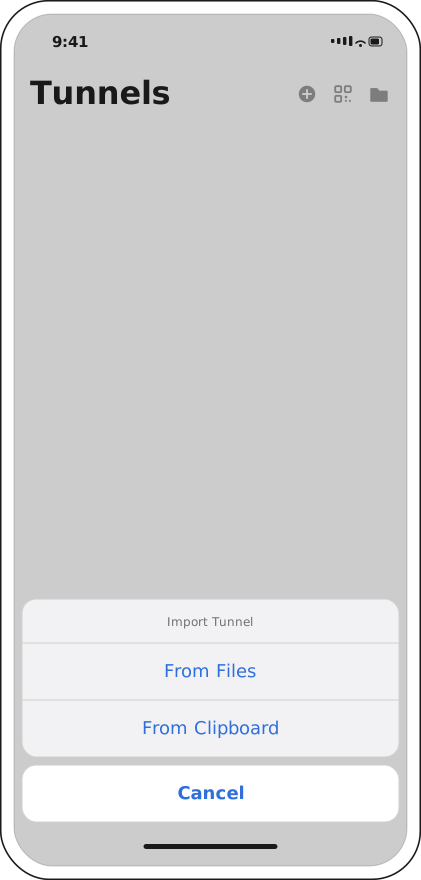
From Files opens the iOS file picker; From Clipboard reads whatever you last copied.
- From Files — pick the
.conffile your administrator sent. Files saved to iCloud Drive, to On My iPhone, or to a third-party provider all work. - From Clipboard — copy the whole configuration text first, including the
[Interface]and[Peer]headings, then choose this option.
Either way the tunnel form opens pre-filled, exactly as after a scan. Check the values and tap Create.
Enter a tunnel by hand
Tap the plus icon in the toolbar to open an empty form. It is split into an Interface section describing this device, and one Peer section per gateway.
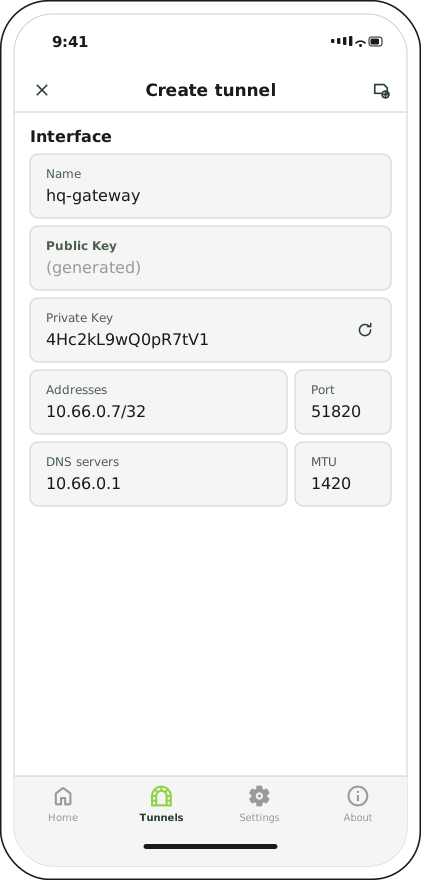
Public Key reads (generated) because Crux derives it from the private key — you never type
it.
| Interface field | What to enter |
|---|---|
| Name | A label for the tunnel, shown in the list and on the Home tab |
| Public Key | Nothing — derived from the private key once you save |
| Private Key | The key your administrator issued, or tap the refresh icon to generate one. Generating a new key only works if your administrator registers the matching public key on the gateway |
| Addresses | The address this device takes inside the tunnel, for example 10.66.0.7/32 |
| Port | The local listen port. Leave empty unless told otherwise |
| DNS servers | The resolvers to use while connected |
| MTU | Leave empty unless your administrator specifies a value |
Scroll on to the peer.
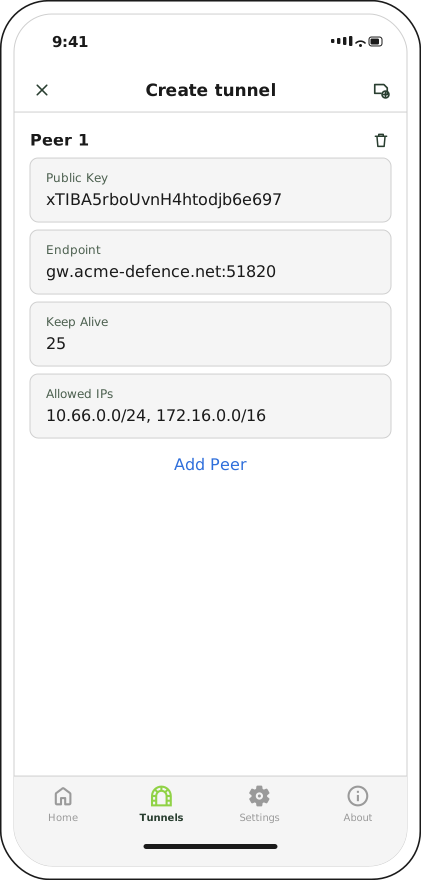
Most deployments use a single peer. Add Peer appends another section for the rare multi-gateway configuration.
| Peer field | What to enter |
|---|---|
| Public Key | The gateway's public key |
| Endpoint | Its address and port, for example gw.acme-defence.net:51820 |
| Keep Alive | Seconds between keepalive packets. 25 is typical for a device behind NAT |
| Allowed IPs | The ranges to route through this tunnel |
Tap Create when the form is complete.
Note
There is no Shared Key field to fill in. On a conventional WireGuard client that field holds a static pre-shared key; in Crux it is agreed with the SKA-Platform at connect time and rotated for the life of the session, so it is read-only and empty until you connect.
Review, edit and delete
Saved tunnels are listed in the Tunnels tab.
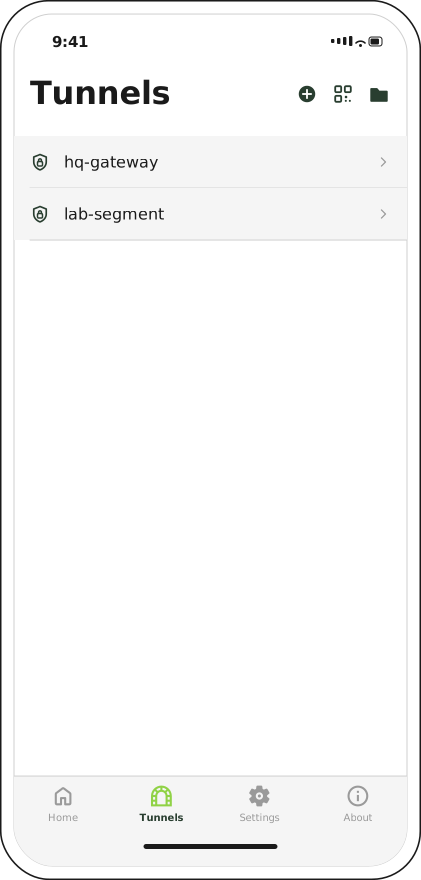
Tap a row to open it.
The detail screen opens read-only, with Edit and Delete in the toolbar.
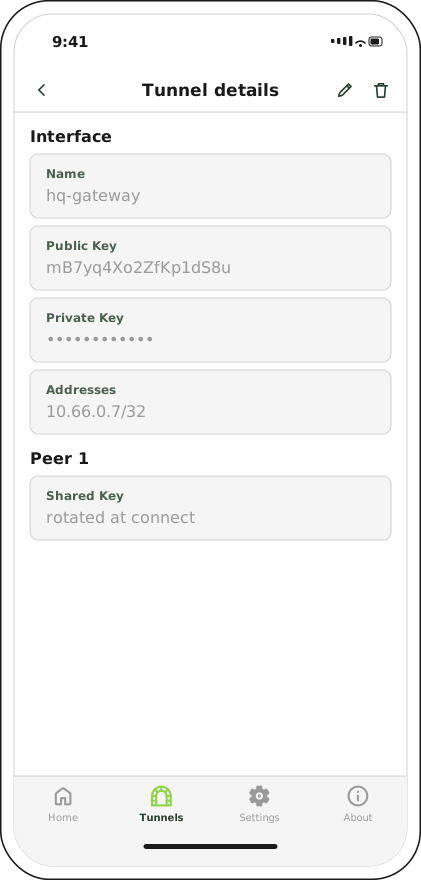
Keys are masked in view mode. Empty optional fields — Port, DNS servers, MTU — are hidden rather than shown blank.
- Edit (pencil) makes the fields editable and swaps the toolbar for Cancel and Save. Nothing is written until you tap Save.
- Delete (bin) asks you to confirm, then removes the tunnel.
A change saved while the tunnel is up does not affect the running session. Disconnect and reconnect to apply it.
Back up your tunnels
The Settings tab can export every tunnel to a zip archive. Do that before deregistering the device, because deregistering deletes all of them.
Next step
With a tunnel saved, connect.